Standing out in the competitive world of dirt bike riding isn’t just about skill – it’s about creating a memorable impression that catches the eye of potential sponsors and fellow riders alike. Whether you’re a weekend warrior or an aspiring professional, transforming your dirt bike’s appearance can make all the difference in getting noticed. This guide will walk you through proven methods to give your dirt bike that professional, head-turning appeal that sponsors love, all while staying true to your personal style and budget constraints. From simple modifications to more complex upgrades, we’ll cover everything you need to know to make your bike the center of attention at your next event or competition.
Contents
Custom Graphics and Decals
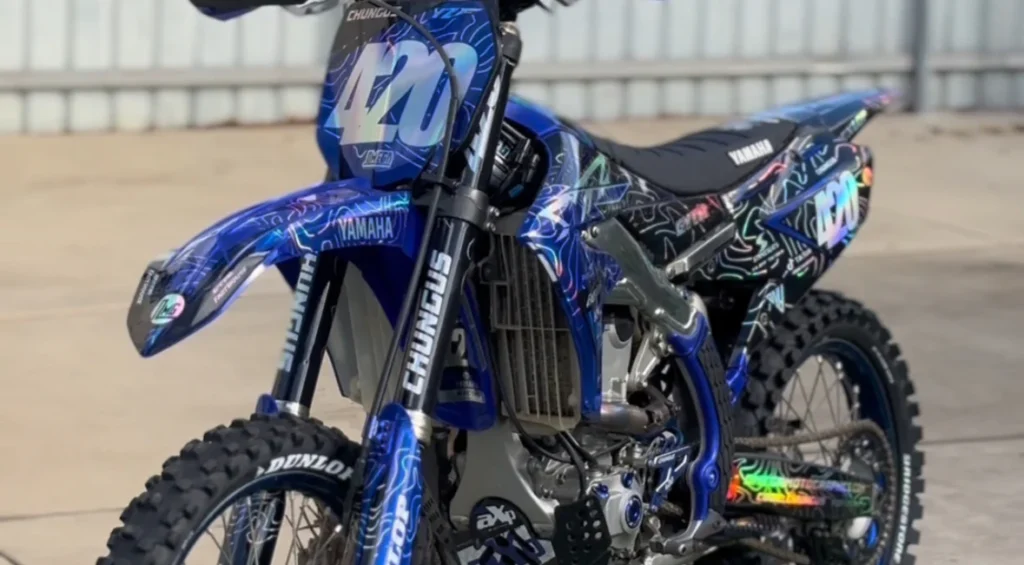
When it comes to making your dirt bike truly unique, custom graphics and decals are your best starting point. This modification option offers the perfect balance of visual impact and practical benefits, making it the go-to choice for riders who want to make a statement. While some riders prefer a minimalist approach with strategically placed decals, investing in a full graphics kit often proves to be the smarter choice for several reasons. Full kits provide complete protection for your bike’s plastic components, shielding them from harmful UV rays and everyday wear and tear. They also create a more cohesive, professional appearance that sponsors tend to notice and appreciate.
When selecting your graphics kit, consider factors like:
- Color schemes that complement your bike’s existing features
- Durability ratings for different riding conditions
- Brand visibility opportunities for potential sponsors
- Installation requirements and maintenance needs
- Cost-effectiveness compared to individual decals
Here’s a comparison of graphic kit options:
| Type | Cost Range | Installation Difficulty | Durability | Professional Appeal |
| Full Kit | $150-300 | Moderate | High | Excellent |
| Partial Kit | $80-150 | Easy | Medium | Good |
| Individual Decals | $20-60 | Easy | Varies | Fair |
Aftermarket Exhaust Systems

Upgrading your dirt bike’s exhaust system represents one of the most impactful modifications you can make, both visually and performance-wise. A complete exhaust system upgrade includes three main components: the header, pipe and muffler. While this modification requires a more significant investment, the benefits extend far beyond mere aesthetics. A properly selected aftermarket exhaust system can:
- Enhance your bike’s overall performance
- Create a distinctive sound signature
- Reduce overall weight
- Improve power delivery across the RPM range
- Add a premium visual element to your bike
When choosing an aftermarket exhaust, consider these important factors:
- Sound regulations at your local tracks
- Weight reduction goals
- Power delivery preferences
- Installation requirements
- Maintenance considerations
- Competition class restrictions
The key is selecting a system that not only looks impressive but also complements your riding style and meets any applicable racing regulations. Most quality aftermarket exhaust systems range from $300 to $1,000, making this a significant but worthwhile investment for serious riders looking to stand out.
Bling Bits
For riders working with a limited budget, bling bits provide an excellent opportunity to create a custom look without breaking the bank. These smaller modifications might seem minor individually, but when thoughtfully combined, they can transform your bike’s appearance and create a distinctive style that turns heads. The key to success with bling bits lies in choosing complementary pieces that create a cohesive overall look.
Here’s a complete breakdown of popular bling bit upgrades and their impact:
| Part | Average Cost | Visual Impact | Installation Difficulty | Durability |
| Anodized Caps | $15-30 | Medium | Easy | High |
| Custom Plugs | $10-25 | Low | Easy | High |
| Colored Bolts | $20-50 | Medium | Easy | Medium |
| Brake Levers | $40-80 | High | Medium | High |
| Gear Shifters | $30-60 | Medium | Medium | High |
| Clutch Covers | $50-120 | High | Medium | High |
| Footpegs | $70-150 | High | Medium | High |
| Brake Perches | $30-70 | Medium | Medium | High |
Pro Tips for Bling Bit Installation:
- Test all moving parts thoroughly after installation
- Start with a color scheme and stick to it
- Purchase parts in sets when possible for better matching
- Consider anodized parts for better durability
- Keep original parts as backups
- Document your installation process for future reference
Suspension Upgrades
Suspension upgrades are popular aftermarket mods for any kind of motorbike, including dirt bikes. While primarily performance-focused, suspension upgrades can significantly enhance your dirt bike’s visual appeal while delivering crucial handling improvements. This modification requires careful consideration and typically represents one of the more substantial investments you’ll make in your bike. A proper suspension upgrade can completely transform both the look and feel of your machine.
Key components of a complete suspension upgrade include:
- Front Fork Modifications
- Custom springs
- Upgraded damping rods
- Performance cartridges
- External adjusters
- Anodized components
- Rear Shock Improvements
- High-performance springs
- Reservoir upgrades
- Linkage modifications
- Custom valving
- Color-matched components
Important Considerations Before Upgrading:
- Your riding style and skill level
- Common terrain types you encounter
- Competition requirements
- Your weight and riding position
- Budget constraints
- Installation expertise needed
Professional installation is strongly recommended for suspension modifications, as proper setup requires specialized knowledge and tools. Expect to invest between $800 to $2,500 for a complete suspension upgrade, depending on the components chosen and labor costs.
New Wheelsets
Nothing transforms a dirt bike’s appearance quite like a fresh set of wheels. Custom wheelsets serve as the perfect foundation for your bike’s overall aesthetic while potentially improving performance through weight reduction and improved strength. When selecting new wheelsets, balancing visual appeal with practical considerations is essential.
Popular wheelset customization options include:
- Hub Combinations
- Anodized aluminum hubs
- Contrast-colored spoke nipples
- Custom spoke patterns
- Colored spoke coatings
- Rim Choices
- Premium alloy constructions
- Custom powder coating
- Engraved designs
- Size variations for different applications
Selection Criteria for Custom Wheelsets:
- Intended riding discipline
- Weight considerations
- Durability requirements
- Maintenance needs
- Color coordination with other modifications
- Budget limitations
A complete custom wheelset typically ranges from $500 to $1,500, making it a significant investment that should be carefully planned to complement your other modifications.
What About Performance Upgrades?
While visual modifications catch the eye, performance upgrades make your bike memorable long after the first impression. These technical improvements not only enhance your riding experience but also demonstrate your commitment to the sport – something sponsors particularly value. Let’s break down the most impactful performance modifications that can help set your bike apart from the competition.
Key Performance Upgrades and Their Benefits:
- Reed Valve Systems
- Improves throttle response
- Enhances low-end power delivery
- Increases overall horsepower
- Better fuel efficiency
- Cost range: $100-300
- Installation difficulty: Moderate
- Gearing System Modifications
- Customized acceleration
- Improved top speed potential
- Better power distribution
- Enhanced control in varying conditions
- Cost range: $150-400
- Installation difficulty: Moderate to High
- Steering Damper Installation
- Reduced arm pump
- Improved stability at high speeds
- Better control in rough terrain
- Enhanced safety features
- Cost range: $300-700
- Installation difficulty: Moderate
- Carburetor Jetting
- Optimized fuel delivery
- Improved throttle response
- Better overall performance
- Enhanced reliability
- Cost range: $50-200
- Installation difficulty: High
Performance Upgrade Comparison Table:
| Upgrade Type | Cost Range | Performance Impact | Installation Time | Required Skill Level |
| Reed Valve | $100-300 | High | 2-3 hours | Intermediate |
| Gearing | $150-400 | Medium-High | 1-2 hours | Intermediate |
| Steering Damper | $300-700 | High | 2-4 hours | Advanced |
| Carb Jetting | $50-200 | High | 3-4 hours | Advanced |
Just be sure to keep providing the bike with all the basic maintenance it needs to make those mods worthwhile by keeping it running for as long as possible.
Maintenance Tips for Modified Bikes
Making your dirt bike stand out isn’t just about adding modifications – it’s about maintaining them properly to ensure long-lasting performance and appearance. A well-maintained modified bike speaks volumes to potential sponsors about your dedication and professionalism.
Extended Maintenance Schedule:
- Daily/Pre-Ride Checks
- Graphics and decal condition
- Bling bit security
- Suspension settings
- Exhaust system integrity
- Wheel and spoke tension
- Performance component operation
- Weekly Maintenance
- Deep cleaning of all modifications
- Checking all fasteners and connections
- Inspecting wear items
- Testing performance modifications
- Documenting any issues
- Photography for sponsor updates
- Monthly Tasks
- Wide system checks
- Performance testing
- Modification adjustments
- Documentation updates
- Sponsor communication
- Future upgrade planning
Advanced Color Coordination Strategies
Creating a visually cohesive dirt bike requires more than just randomly selecting colored parts. A well-planned color scheme can make even modest modifications look professionally coordinated. Understanding color theory and it’s application to dirt bike modifications can significantly impact your bike’s overall appearance.
Primary Color Scheme Planning:
- Base Colors (60% of visual elements)
- Frame and plastics
- Main graphics elements
- Seat cover
- Number plate backgrounds
- Major body panels
- Secondary Colors (30% of visual elements)
- Accent graphics
- Wheel components
- Suspension parts
- Brake and clutch levers
- Footpegs and controls
- Accent Colors (10% of visual elements)
- Small decals
- Bolt kits
- Minor detail parts
- Chain guide
- Brake line accents
Color Combination Guide:
| Primary Color | Complementary Color | Accent Options | Visual Impact |
| Blue | Orange | White/Silver | High Energy |
| Red | Green | Black/Gold | Aggressive |
| Yellow | Purple | Black/Silver | Dynamic |
| White | Black | Any Bold Color | Professional |
| Green | Red | Gold/Silver | Natural |
Safety Considerations for Modified Bikes
While making your bike stand out is important, ensuring all modifications are safe and legal is crucial:
Safety Checklist for Modifications:
- Structural Integrity
- Frame modifications
- Suspension changes
- Wheel alignments
- Brake system updates
- Control modifications
- Performance Safety
- Power output limits
- Brake effectiveness
- Handling characteristics
- Noise regulations
- Emissions compliance
Safety Regulation Compliance:
| Modification Type | Safety Check Required | Frequency | Professional Input Needed |
| Engine Mods | Yes | Every Race | Yes |
| Suspension | Yes | Bi-Monthly | Yes |
| Controls | Yes | Monthly | Optional |
| Graphics | No | As Needed | No |
| Wheels | Yes | Monthly | Yes |
Where to Get Started
Getting Started: A Strategic Approach to Modifications
Creating a standout dirt bike requires careful planning and strategic implementation. Here’s a complete guide to help you begin your modification journey effectively:
Phase 1: Initial Planning (Week 1-2)
- Set a realistic budget
- Research current trends
- Identify potential sponsors
- Create a modification timeline
- Document current bike condition
- Establish performance baselines
Phase 2: Essential Modifications (Weeks 2-4)
- Graphics Kit Installation
- Choose design theme
- Select quality materials
- Plan installation process
- Document transformation
- Share progress on social media
- Basic Performance Upgrades
- Start with simple improvements
- Focus on reliability
- Document performance gains
- Maintain factory settings as backup
Phase 3: Advanced Modifications (Months 2-3)
- Implement major upgrades
- Fine-tune performance
- Monitor reliability
- Document all changes
- Build sponsor relationships
Budget Allocation Guide:
| Modification Category | Percentage of Budget | Priority Level |
| Graphics/Aesthetics | 20-25% | High |
| Performance Upgrades | 35-40% | High |
| Suspension | 20-25% | Medium |
| Bling Bits | 10-15% | Low |
| Documentation/Media | 5-10% | Medium |
Remember that standing out in the dirt bike community is a journey, not a destination. Start with the basics, document your progress and build upon your success. Most importantly, ensure that every modification serves a purpose and contributes to your overall goals as a rider.